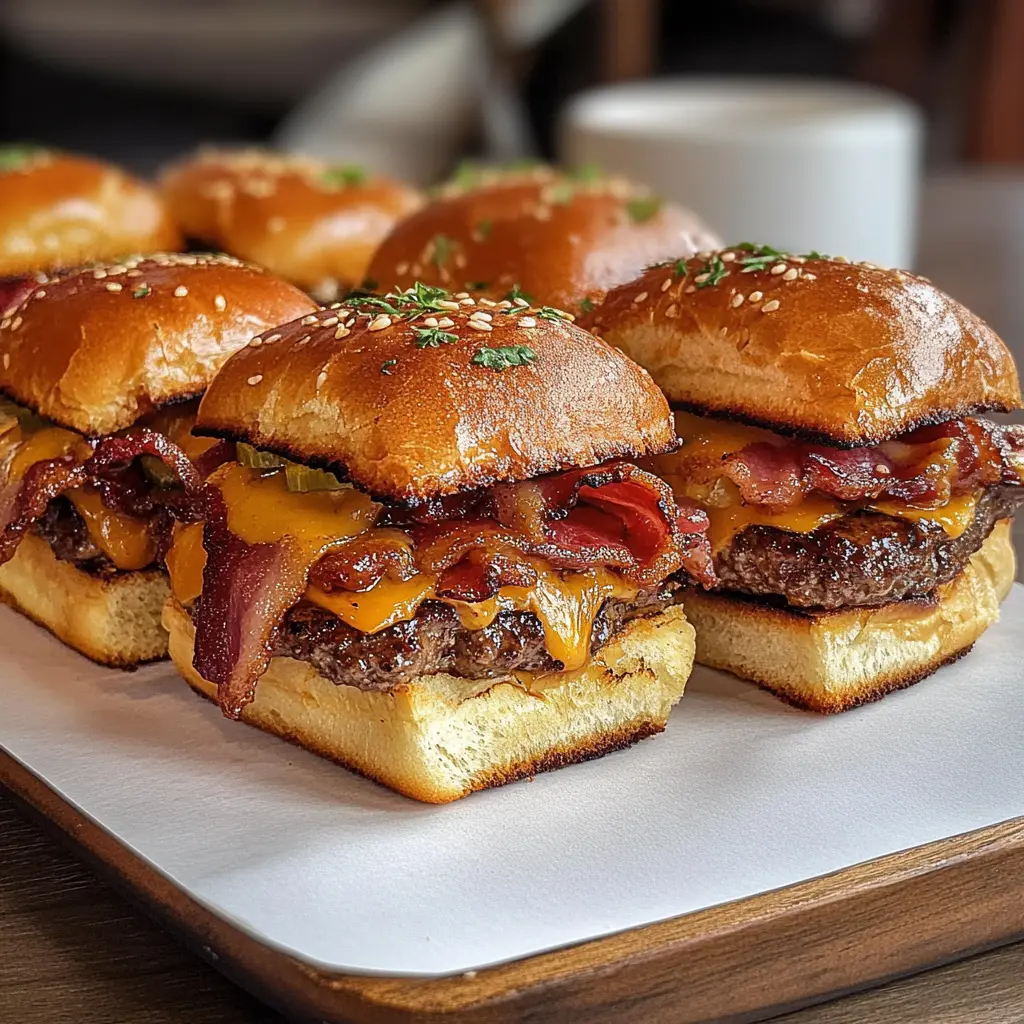
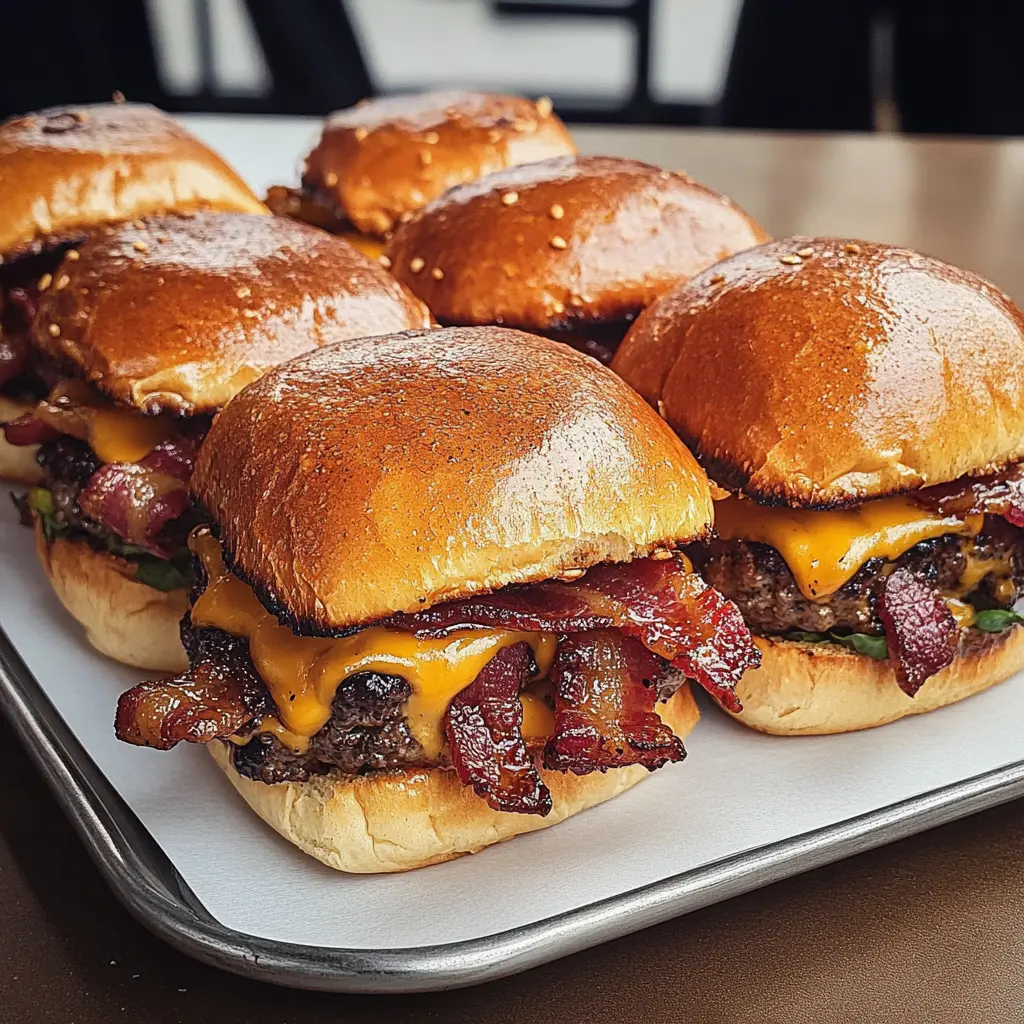
These Bacon Cheeseburger Sliders are tiny burgers packed with flavor! Juicy beef, crispy bacon, and melted cheese come together on soft little rolls for a fun and tasty treat.
Who can resist a mini burger with all that goodness? I like to serve them with some pickles on the side for a crunchy kick. Perfect for parties or just a cozy movie night! 🍔
Key Ingredients & Substitutions
Slider Buns: Choose buttery or sweet slider buns for the best flavor. If those aren’t available, you can use dinner rolls or even regular burger buns cut down to size.
Ground Beef: I recommend using 80/20 ground beef for juicy sliders. If you’re looking for a leaner option, 90/10 can work, but they might be a bit drier. For alternatives, turkey or plant-based ground meat could also be used.
Cheddar Cheese: While I love sharp cheddar for its rich taste, feel free to swap it for American or pepper jack cheese for a different flavor. Just remember, the cheese should melt well.
Bacon: Crispy bacon is a must! However, you could use turkey bacon or even skip it altogether for a lighter version. Veggie bacon is another good alternative if you want to keep it meat-free.
Onion: Adding onions gives a nice touch, but they’re optional. If you’re not a fan or want a substitute, leeks or shallots can add a different flavor profile. For a milder option, try using scallions instead.
How Do I Ensure My Sliders Stay Juicy and Flavorful?
Making juicy sliders is all about not overworking the meat and cooking them properly. Here’s how to achieve that:
- When mixing ingredients, gently combine the beef without pressing too hard. This keeps the meat tender.
- Shape the patty slightly larger than the slider buns because they’ll shrink as they cook.
- Cook the patties over medium heat to ensure they cook evenly and stay juicy. Avoid pressing down on them in the skillet!
- Adding the cheese during the last minute of cooking helps it melt perfectly without drying out the meat.
Delicious Bacon Cheeseburger Sliders Recipe
Ingredients You’ll Need:
For the Sliders:
- 12 slider buns (preferably buttery or sweet)
- 1 lb ground beef (80/20 preferred for juiciness)
- 8 slices cheddar cheese
- 8 slices cooked bacon, chopped
- 1/2 cup onion, finely chopped (optional)
- 1 tbsp Worcestershire sauce
- 1 tbsp garlic powder
- 1 tsp salt
- 1/2 tsp black pepper
- 1/4 cup unsalted butter, melted
- 1 tsp sesame seeds (optional, for garnish)
How Much Time Will You Need?
This recipe will take about 15 minutes to prepare and about 25 minutes to cook, bringing the total time to around 40 minutes. You’ll love how quickly these sliders come together for a delicious meal that’s sure to please everyone!
Step-by-Step Instructions:
1. Preheat the Oven:
Begin by preheating your oven to 350°F (175°C). This is an important step to ensure your sliders are perfectly toasted and warm when they come out of the oven.
2. Mix the Beef:
In a large mixing bowl, combine the ground beef with Worcestershire sauce, garlic powder, salt, and black pepper. Use your hands or a spoon to mix everything until just combined—be gentle so your beef stays tender.
3. Shape and Cook the Burger Patty:
Shape the mixed beef into a rectangular patty that fits the size of your slider buns. Heat a skillet over medium heat and cook the patty for about 4-5 minutes on each side, or until it’s cooked to your liking. In the last minute, place the cheddar cheese slices on top to let them melt.
4. Toast the Slider Buns:
While your burger is cooking, place the slider buns in the oven and lightly toast them for about 5 minutes, or until they’re golden brown and delicious. This will add a nice crunch to your sliders!
5. Sauté the Bacon and Onion:
Once your burger is done, remove it from the skillet. In that same skillet, toss in the chopped bacon and onion (if you’re using it) and sauté for 1-2 minutes until the onion is soft and fragrant.
6. Assemble the Sliders:
Now it’s time to put it all together! On the bottom half of each slider bun, place a piece of the cooked burger patty followed by a generous sprinkle of chopped bacon. Top it with the other half of the bun. Drizzle the melted butter over the assembled sliders and, if you like, sprinkle with sesame seeds for extra flavor.
7. Final Bake:
Return the assembled sliders to the oven and bake for an additional 10-12 minutes. This warms everything through and ensures the cheese is perfectly melted.
8. Serve and Enjoy:
Once they’re done, take the sliders out, slice them into individual sliders, and serve warm. Enjoy your tasty bacon cheeseburger sliders with your favorite dipping sauces or sides!
Can I Use Ground Turkey or Chicken Instead of Beef?
Absolutely! You can use ground turkey or chicken as a leaner alternative. Just be aware that they may require a little extra seasoning since they tend to be milder in flavor. You might consider adding more garlic powder or some herbs to enhance taste.
How Can I Make These Sliders Vegetarian?
To make vegetarian sliders, substitute the ground beef with a plant-based burger patty or a mixture of black beans and quinoa. Just ensure you adjust the cooking time so they’re heated through. You can still use the same toppings like cheese and bacon substitutes like crispy mushrooms or vegan bacon.
Can I Prepare the Sliders Ahead of Time?
Yes, you can prepare the patties in advance! Shape the patties and store them in the fridge for up to 24 hours before cooking. If you want to freeze them, wrap each patty in plastic wrap and store in an airtight container for up to 3 months. Just make sure to thaw them in the fridge overnight before cooking.
How Should I Store Leftover Sliders?
Store any leftover sliders in an airtight container in the fridge for up to 3 days. To reheat, place them in the oven at 350°F (175°C) for about 10 minutes. This will help retain their texture, or you can microwave them, but they may get a little soggy.