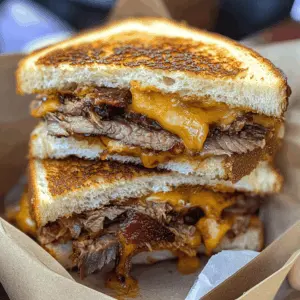
These Ham and Cheese Sliders are like little bundles of joy! With layers of tasty ham and gooey cheese, they are baked in soft, buttery rolls that everyone will love.
Honestly, these sliders are great for parties or a quick snack at home. I can never eat just one. They’re just too yummy! Plus, they’re super simple to whip up!
Key Ingredients & Substitutions
Slider Buns: I recommend using soft dinner rolls for a fluffy texture. If you can’t find slider buns, regular sandwich bread or even mini bagels work well too. This allows you to adapt the dish based on what you have at home!
Ham: Sliced ham is key here, but you can substitute it with turkey, roast beef, or a plant-based ham if you prefer. I love using honey-glazed ham for added sweetness. It brings a wonderful flavor to each bite!
Cheese: Swiss and cheddar are both great choices, but feel free to mix cheeses or use provolone, gouda, or mozzarella instead. I sometimes use a blend, which can make each slider taste unique.
Butter: The melted butter adds richness, but for a lower-calorie option, you can use olive oil or a butter substitute. There are many alternatives available that still give a delicious finish!
Poppy Seeds: These add a nice crunch and nutty flavor, but they’re optional. You could use sesame seeds or even leave them out completely if you prefer a simpler topping.
How Do I Make Sure My Sliders Are Perfectly Coated with the Sauce?
Coating the sliders with the butter mixture is crucial for flavor. To get it just right, mix the ingredients thoroughly in your bowl. This ensures that the flavors blend well before application.
- Use a brush or spoon to carefully drizzle the mixture over each slider, focusing on the edges too. This helps keep the buns moist!
- Don’t skip covering the dish with foil for the first part of baking. This helps steam the sliders, making everything melt together beautifully.
- Once you uncover them, watch closely to avoid burning—golden brown is what you’re aiming for!

How to Make Ham and Cheese Sliders?
Ingredients You’ll Need:
For the Sliders:
- 12 slider buns (dinner rolls)
- 8 oz sliced ham
- 8 oz sliced cheese (Swiss, cheddar, or your choice)
For the Butter Mixture:
- ½ cup butter, melted
- 2 tbsp Dijon mustard
- 1 tbsp Worcestershire sauce
- 1 tsp garlic powder
- 1 tsp onion powder
- Salt and pepper to taste
- 1 tsp poppy seeds (optional)
How Much Time Will You Need?
This recipe will take about 10 minutes to prep and an additional 25-30 minutes to bake. In total, you should expect to spend around 40 minutes before you can sink your teeth into those yummy sliders!
Step-by-Step Instructions:
1. Preheat the Oven:
First things first, preheat your oven to 350°F (175°C). This is important to ensure that your sliders cook perfectly and become nice and golden.
2. Mix the Butter Sauce:
In a small bowl, mix together the melted butter, Dijon mustard, Worcestershire sauce, garlic powder, onion powder, salt, and pepper. Stir until everything is well combined and set it aside. This will add amazing flavor to your sliders!
3. Assemble the Bottom Layer:
Grab a greased 9×13-inch baking dish and lay the bottom halves of the slider buns in it. Make sure they fit snugly next to each other.
4. Layer the Ham and Cheese:
Next, layer the sliced ham evenly over the bottom buns. Then, place the cheese slices on top of the ham, covering it fully with cheesy goodness.
5. Add the Top Buns:
Now, place the top halves of the slider buns over the cheese. You’re almost there!
6. Drizzle the Butter Mixture:
Carefully pour the butter mixture evenly over the tops of the assembled sliders. Make sure every slider gets its share of that delicious sauce. If you’d like, sprinkle poppy seeds on top for an extra touch.
7. Bake the Sliders:
Cover the baking dish with aluminum foil and pop it into your preheated oven. Bake for about 15 minutes to get things started.
8. Uncover and Brown:
After 15 minutes, remove the foil and let the sliders bake for another 10-15 minutes. Keep an eye on them—you want the tops to be golden brown and the cheese to be deliciously melted!
9. Cool and Prepare to Serve:
Once they’re ready, take them out of the oven and let them cool for a few minutes. This will make them easier to slice and serve.
10. Slice and Enjoy:
Finally, slice your sliders and dig in! Enjoy your tasty, cheesy ham and cheese sliders with family and friends!

Can I Use Different Types of Meat?
Absolutely! You can substitute the ham with turkey, roast beef, or even a vegetarian option like grilled vegetables or mushrooms. Just ensure that the meat you choose pairs well with the cheese for the best flavor!
How Can I Make This Recipe Ahead of Time?
You can assemble the sliders and cover them tightly with plastic wrap or aluminum foil up to a day in advance. Just remember to bake them right before serving so they’re warm and melty!
What’s the Best Way to Store Leftover Sliders?
Store any leftover sliders in an airtight container in the fridge for up to 3 days. To reheat, place them in the oven at 350°F (175°C) for about 10 minutes until warmed through. This helps to keep the buns from getting soggy!
Can I Freeze Ham and Cheese Sliders?
Yes, you can freeze the assembled but unbaked sliders! Wrap them tightly in plastic wrap and then in aluminum foil to prevent freezer burn. When you’re ready to bake, no need to thaw—just bake a little longer until cooked through.


